Monday, June 6, 2011

Fake Mail For iPhone Lets You Send Email Messages Using A Fake Email Address [Cydia App]

Fake Mail or ‘FakeMail’ is a Cydia App that lets users send anonymous email, or more specifically, email from inexistent email addresses. Useful if you want to pull a prank on your friends or just don’t want to be identified on a particular email you’re sending.
Fake Mail (1)
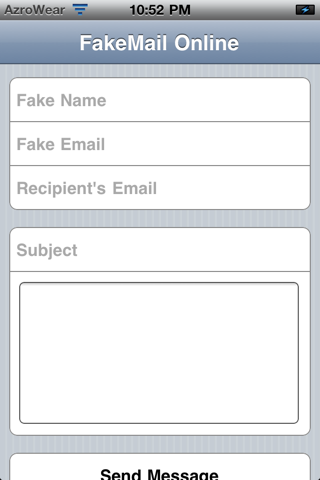
By entering your desired email address (yes, you can use any email address, even if it doesn’t exist), name and the address of the person you’re trying to send it to, you can then type up the email you want to send. Then you can just hit "Send" and your message will reach its destination. On the other end, users won’t be able to tell that the sender address is faked, since it will appear like a real address. It’s that good!
Fake Mail (2)
This is possible thanks to the structure of email itself. Every email message has a header, where information about the sender (including their email address), recipient and the message’s subject are stored. Since the sender information isn’t verified on the server end in any way, it’s possible to just insert anything into the header. You can try this for yourself by opening any email message on a standard word processor, even Notepad.
The major caveat is the inability to receive replies, since there isn’t a real inbox to reply to. If you’re expecting to do an anonymous exchange, there just is no way to do that using this app.
You can get Fake Mail today from Cydia’s BigBoss repository.
Last but not least, it’s important to note that this app will requires you to jailbreak your phone first, since, just like anything outside the official App Store, it’s not approved by Apple. It’s recommended that you have basic skills on how to restore your device, in case something goes wrong.
You can follow our step by step guide to jailbreak your iPhone, iPad or iPod touch on iOS 4.3.1 with Redsn0w, PwnageTool 4.3 (untethered |tethered) on Mac, or with Sn0wbreeze on Windows, or on iOS 4.3.2 with Redsn0w, PwnageTool 4.3 (tethered), or with Sn0wbreeze on Windows, or on iOS 4.3.3 using Redsn0w, PwnageTool and Sn0wbreeze.
Of course, proceed with caution when sending out fake email. Remember that impersonating other people can get you into serious trouble, therefore better stick to funny, harmless pranks.
Check out our iPhone Apps Gallery and iPad Apps Gallery to explore more apps for your iPhone, iPad and iPod touch.

Recover Deleted Photos From iPhone, iPad, iPod touch Using Photo Rescue App

Hands up if you’ve ever restored your iDevice only to realize you hadn’t saved your photos somewhere beforehand? Come on, hands all the way up. That means you at the back!
While it’s not the end of the world if you intend on restoring a backup of your device, if you want to start afresh you’re out of luck. Or, you were until Photo Rescue came along.
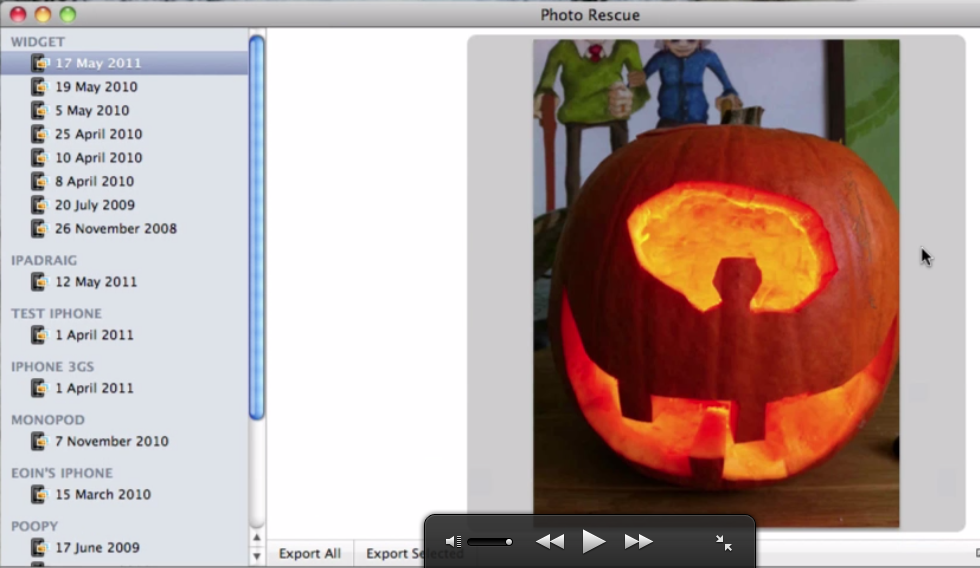
Photo Rescue is a nice, simple way of peeking into your iDevice backups and picking out your much-loved photos for restoration.
Has your iPhone or iPad been lost, stolen or broken? Photo Rescue will recover your precious memories from iTunes’ backup files on your Mac.
Photo Rescue scans all of the iOS backups on your Mac and presents all the photos it finds in a simple image browser.
Using the free version of Photo Rescue will allow you to see what photos are part of which backups, but if you want to retrieve them you’ll be paying the very reasonable $4.99 for the full version. All devices which have backups on your computer will show here.
One caveat for some though – Photo Rescue is Mac-only right now, so if you’re a Windows user you’re out if luck here unfortunately. Also, encrypted backups are not supported, though we’re willing to bet that doesn’t affect the vast majority.
Photo Rescue is available for download now.
[UPDATE]
Interesting developments regarding our new favorite photo-rescue app folks. We just received an email from the app’s lead developer Padraig Kennedy and it seems the company fell foul of the naming merry-go-round with the discovery of an app already named Photo Rescue. As a result the team has renamed their app to ‘Picturescue’ complete with a new web site URL: http://picturescueapp.com.
Thanks for the heads-up Padraig.
{Source: iDB}

Around 30,000 To 120,000 Android Users Affected By A New Malware, Here’s How To Protect Your Phone

According to Lookout, an Android anti-malware maker, there’s a new threat in the wild that is said to have affected between 30,000 and 120,000 headsets already.
Android Malware
This piece of malware is the second iteration of a previous threat, known as "DroidDream", which hit the platform last March, that had the ability to download malicious packages onto the device.
This new malware, known as "DroidDreamLight" is essentially similar to the previous version: it uses fake Android Apps on the Android Market in order to spread and, just like the original "DroidDream", it’s able to download malicious packages onto the infected device. However, unlike its predecessor, it can’t download those in the background, meaning that the risk of infection is much lower, although it can still harm unsuspecting users. "DroidDreamLight" can also contact remote servers even when the infected app isn’t running, making the threat more dangerous. Once an infected App is downloaded, the malware will immediately send out information about the device’s specifications to a remote server:
Malicious components of DroidDream Light are invoked on receipt of a  android.intent.action.PHONE_STATE intent (e.g. an incoming voice call).  DroidDream Light is not, therefore, dependent on manual launch of the installed application to trigger its behavior.  The broadcast receiver immediately launches the <package>.lightdd.CoreService which contacts remote servers and supplies the IMEI, IMSI, Model, SDK Version and information about installed packages.
The malware’s authors have modified reputable Apps commonly available from the Android Market and repackaged them with the infected code. The fake Apps were then submitted back to Google’s own Android Market using 5 different developer accounts. Please stay alert if you’ve downloaded any of the following Apps recently:
Magic Photo Studio
  • Sexy Girls: Hot Japanese
  • Sexy Legs
  • HOT Girls 4
  • Beauty Breasts
  • Sex Sound
  • Sex Sound: Japanese
  • HOT Girls 1
  • HOT Girls 2
  • HOT Girls 3
Mango Studio
  • Floating Image Free
  • System Monitor
  • Super StopWatch and Timer
  • System Info Manager
E.T. Tean
  • Call End Vibrate
BeeGoo
  • Quick Photo Grid
  • Delete Contacts
  • Quick Uninstaller
  • Contact Master
  • Brightness Settings
  • Volume Manager
  • Super Photo Enhance
  • Super Color Flashlight
  • Paint Master
DroidPlus
  • Quick Cleaner
  • Super App Manager
  • Quick SMS Backup
Infected applications have already been removed from Android’s marketplace, but be on the lookout, since there’s the possibility that this threat might arise once again.
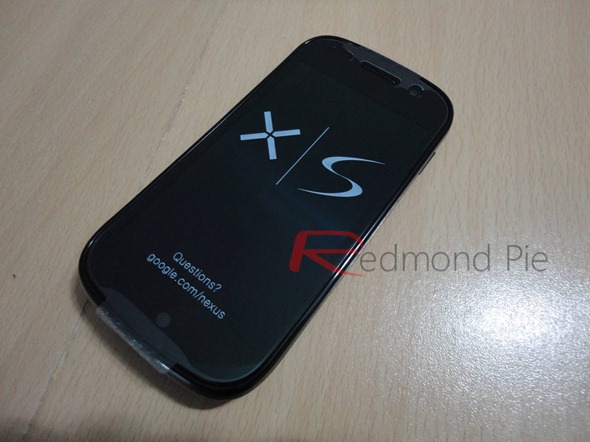
Nexus S 4G
How to protect yourself: Download an anti-malware program for Android, such as Lookout, AVG for Android and SmartGuard Mobile Security and keep it updated. We’re going to start taking the security of our smartphones as seriously as the security of our PCs.
An open platform such as Android has sure brought many benefits, but just as many shortfalls as well. The fact that there’s no approval process for Android Apps makes the platform incredibly vulnerable, especially due to its rising popularity. Please download an anti-malware application to ensure your device’s safety.
(via ReadWriteWeb)

FaceNiff App Makes It Easy To Hack Facebook, Twitter And YouTube Accounts From Android Phones

FaceNiff is a new Android App that makes it literally effortless to log into someone else’s Facebook account, if that person is on the same Wi-Fi network. Yes, any Wi-Fi network.
FaceNiff
This application works by capturing all the packets that are sent back and forth inside the network. While the application itself won’t break into Facebook, it will wait for a legitimate user to login, then it will intercept the data and display the user’s login ID. By simply clicking on it, an ill-intentioned user would be able to log in and take over the account. In addition to Facebook, this application supports Twitter, YouTube, Amazon and Nasza-Klasa, a Polish micro-blogging platform.
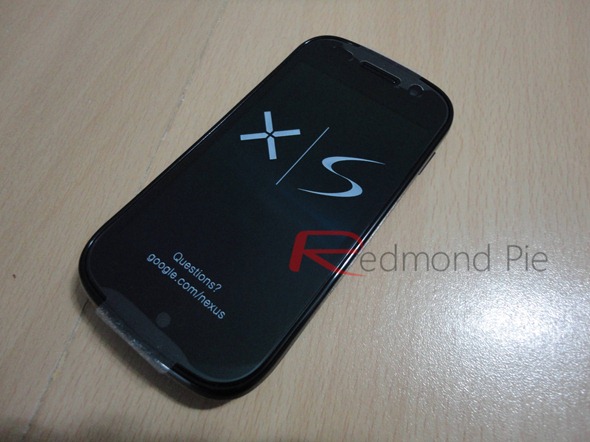
Nexus S 4G
This App is an elaborate form of packet sniffer, a program that intercepts data that’s sent back and forth inside a network. There are many packet sniffers available online for free, such as Wireshark, a full-fledged Windows application, and more recently Firesheep, a Firefox add-on. The main difference between FaceNiff and other packet sniffers is the program’s ease of use: while most packet sniffers capture every single packet that is sent or received inside the network, unless it’s configured otherwise, FaceNiff was designed specifically for collecting login data. That makes this app a lot less idiot-proof, and therefore more widespread.
There are ways you can protect yourself from these attacks. The most obvious way would be to use HTTPS on public networks, as opposed to HTTP. Services like Gmail, and yes, Facebook, have a setting that allows users to log in with HTTPS. You can also get a free VPN, such as Hotspot Shield, which will automatically encrypt all the data that’s sent from your computer. Both of those measures will shield sensitive data from prying eyes and yes, packet sniffers. If you’re a regular user of public Wi-Fi, stay on the lookout and make sure you’re safe.
In order to use this application, the phone needs to be rooted, which should be fairly effortless for most people. Once that’s done, you can get the application from this website. The developer stresses that this app was made "for educational purposes only" and let’s keep it that way. If you don’t know how to be a responsible individual, you most likely shouldn’t be allowed anywhere near a phone to begin with.

iAndroid For iPhone Brings Android Simulation Experience To iOS [Cydia App]

iAndroid is a new iOS application for jailbroken devices that simulates the Android operating system experience on the iPhone or iPod touch. While it’s still very far from completion, the project is taking shape.
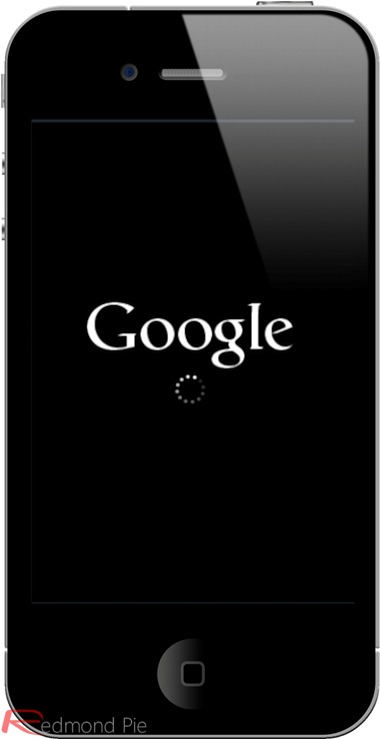
This App can be launched from the home screen, just like any other iOS application. The application will display a Google logo, followed by an Android-like screen that takes cues from HTC Sense user interface. The big large digital clock is easily recognizable from Sense, while the bottom slider is similar to the one found on Android’s default interface. There are a few default "Apps" built into the simulator, such as a web browser, a finger-doodling application and even a number pad, although it’s not that clear whether it makes real calls or not.
iAndroid (1)
Unlike what it may look like at first, this doesn’t emulate Android in any way, shape or form. It simply replicates Android’s user experience inside a standard iOS application. That’s easy to tell, since there’s no access to Google’s Market, and in fact, doesn’t allow Apps to be installed altogether. If you want to run the real Android OS on your iPhone, we have previously covered an early method which could work for you.
iAndroid
This application was created by fr0st, who has authored apps such as “OS Faker", which simulates both the Android the the Windows Phone 7 user interfaces on iOS. The developer has also announced a few other simulators on his website, including a PS3 simulator and even a Windows XP simulator, even though they’re all allegedly "Coming Soon" at the moment.
If you’re an iOS 4.x user and want to try this simulator for yourself, you can get it from on Cydia. Sadly, iAndroid is not available for iOS 3.x users, in order to make sure that the app works as well as it possibly can on newer versions of iOS.
Last but not least, it’s important to note that this App will require you to jailbreak your phone first, since, just like anything outside the official App Store, it’s not approved by Apple. It’s recommended that you have basic skills on how to restore your device, in case something goes wrong.

Fix iPhone Side Switch Vibrate Problem After iOS 4.3.3 Jailbreak With Redsn0w 0.9.6rc16 / PwnageTool 4.3.3.1 / Sn0wbreeze 2.7.1

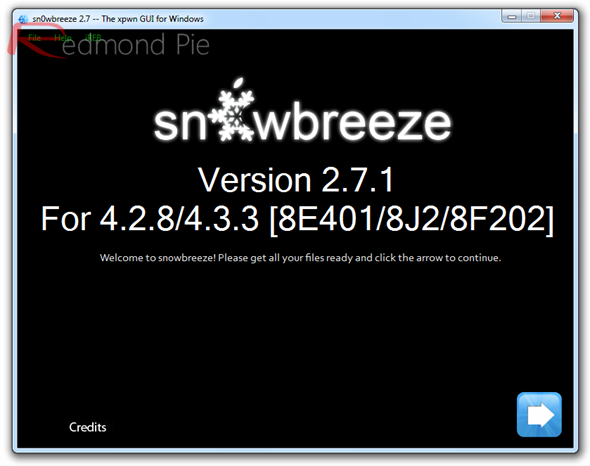
Updated version of Redsn0w, PwnageTool and Sn0wbreeze for iOS 4.3.3 jailbreak are now available which fixes side switch vibrate problem on iPhone 4 and 3GS after untethered jailbreak on iOS 4.3.3.
Sn0wbreeze 2.7.1
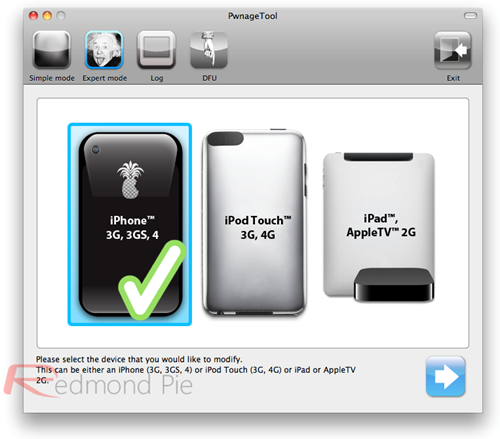
Instructions for jailbreaking your iPhone on iOS 4.3.3 with these updated version of Redsn0w, PwnageTool and Sn0wbreeze are exactly similar to the last release of their respective versions. Simply follow the instructions posted here to jailbreak using Redsn0w, or here if you are using PwnageTool, or here if you prefer Sn0wbreeze.
PwnageTool 4.3 (4)
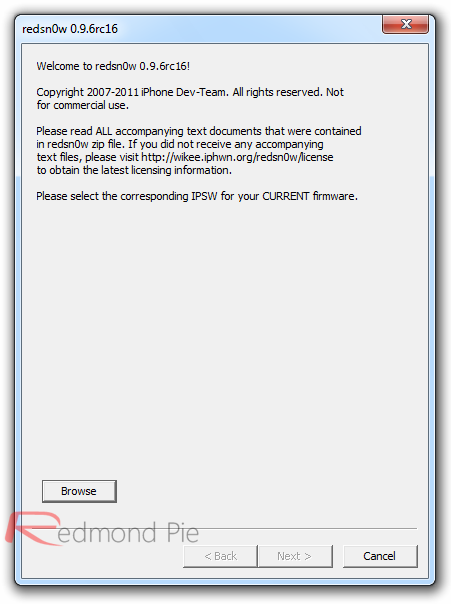
For those of you who are already jailbroken using Redsn0w can simply rerun the latest Redsn0w 0.9.6rc16 over your existing jailbreak. Make sure you uncheck “Install Cydia” option, and just check any other option to proceed with the jailbreak which includes the fix.
Redsn0w
If you’re already jailbroken at 4.3.3 (by either redsn0w rc15 or custom IPSW), you can install this fix simply by running redsn0w rc16 over your existing 4.3.3 jailbreak.  Just uncheck the “Install Cydia” option and check any other options you want.  The fix will be installed no matter what you’ve selected.  This is safe for even ultrasn0w unlockers to do (because redsn0w itself won’t update your baseband…only an iTunes stock IPSW update/restore will do that).
redsn0w rc16 has a few more improvements:  Windows 7 and Vista users should no longer need to set their CPU affinity…just run redsn0w as Administrator in XP compatiblity mode.  Also, the “verbose boot” option for old-bootrom iPhone 3GS has been fixed for 4.3.3 (remember: old-bootrom 3GS users can even have custom bootlogos that show right at power-up).
Download iOS 4.3.3 for iPhone 4, 3GS, iPad, iPod touch
Download Redsn0w 0.9.6rc16 for Windows
Download Redsn0w 0.9.6rc16 for Mac
Download PwnageTool 4.3.3.1 for Mac
Download Sn0wbreeze 2.7.1 for Windows
Download iTunes 10.2.2 for Windows or Mac

Microsoft Working on FaceTime Competitor for Windows Phone 7

Steve Ballmer did not announce much about upcoming Windows Phone 7 updates at CES this year, except for demoing cut-copy-paste. However, according to Neowin.net, a key Windows Phone 7 employee has revealed some information to them on where the platform was heading. One of the features that were discussed was that Microsoft was working on a FaceTime competitor for Windows Phone 7.

FaceTime for Windows Phone 7
The said application will probably integrate with Microsoft’s Live services, so it could be used on all Windows Phones. When someone asked why Microsoft wouldn’t use something like Skype, the employee answered by saying that FaceTime competitor would “reach beyond the hand of Skype”. Also, Neowin claims that front-facing cameras may be a requirement for Windows Phone 8 devices. Though at this point, it is not yet clear on whether this application will be a part of Windows Phone 8, or come as an update to Windows Phone 7.

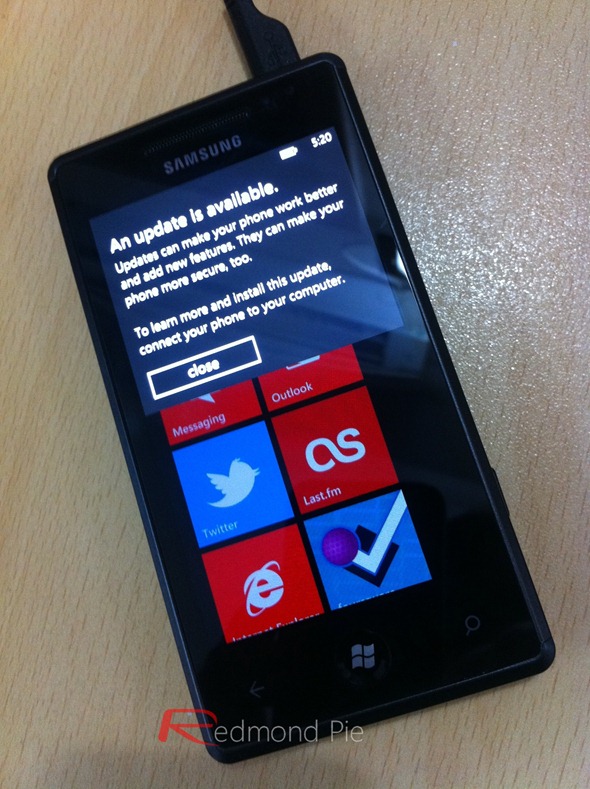
Microsoft Windows Phone 7 7392 Firmware Update

Microsoft has begun pushing out a new security update for its Windows Phone 7 mobile devices.

The update comes as a response to reports starting back in March that certification authority Comodo had granted nine fraudulent digital certificates. While Comodo revoked the certificates, Microsoft has warned that they could be used to attack users of the company’s Internet Explorer both on the desktop and its smartphones by using phishing attacks, spoofing content and other such nastiness.


WP7 Update
The security update brings Windows Phone 7 up to version number 7392 and devices are currently receiving over-the-air notifications, and that they need to be plugged into Microsoft’s Zune client in order to be updated.

Sunday, June 5, 2011

Install Mac OS X Leopard OSx86 on PC Dual Boot Windows 7, Vista

Before you Begin
There are Several Flavours of OSX86 Project available. Few of the popular ones are:
iPC, iATKOS, Kalyway, iDeneb etc.
None of these is perfect, but as time passes, they approach perfection.
iPC is the most advanced you can get, keeping into consideration that it supports largest database of hardware, followed by Kalyway, iDeneb and others. Most Important thing you should check for is your Hardware compatibility List (HCL) on OSX86 wiki.


Steps to install:
1. Download OSx86 10.5.x
Go to your favorite torrent site and Download 10.5.x of your favorite flavor among the listed ones. Latest version is 10.5.7. Though 10.5.6 is also a fair deal. Burn the downloaded “.ISO” file to DVD using PowerISO / MagicISO or any other burning software.
2. Create Partition, preparing Disk:
In windows 7 or vista, Right click My computer > Manage, click Disk Management. Here create a primary partition with minimum 8GB space, though recommended is 15GB. There is no need to format this partition. After Partition is created, right click > Mark Partition as Active.
Burn the OSX86 ISO that you downloaded from torrents on to a DVD and reboot with Boot from DVD. Now you should see Darwin load screen.
3. Booting and starting Installation
As countdown from 10 starts, press F8 key and you will be able to have some more option’s. Now type -v and press enter now entered in VERBOSE mode, this will enable you to see any errors if they occur. In case your screen freezes for more than 10 minutes than note last lines and google them to find out a solution for your problem. If every thing goes fine after 15-30 minutes installation screen appear’s hold your breath we are not quit yet here.
Alternatively, to skip the booting errors, you can try these parameters on Boot: prompt
-cpus=1, -cpus=2.
4. Configuring Installation
After boot, you enter the Graphical interface and you should be able to see a top menu. From the menu Click Utilities > Disk Utility.
Here, select the destination drive where you want to install Mac OSX. this will be the same partition we created earlier in step 1.
Now click on ERASE on right hand side and under the format option select “MAC OSX Journaled Extended” and click Erase. The disk will be erased and mounted. Close the disk utility and agree to the terms and conditions, then select the partition which you erased recently.
5. Customize the Install
The most important part is this step. Now, choose wisely what all components you need to support your running hardware. Browse at http://wiki.osx86project.org/wiki/index.php/Main_Page Navigate to the HARDWARE section and choose your version(10.5.x) and computer type (Portable/Desktop). This page should give sample hardware examples that people have tested, and modules they have selected.
If you have doubts, you can check the Insanelymac.com forums.
For most of the INTEL based systems Vanilla Kernel works very smoothly & for AMD system try Voodoo kernel. It is recommended to remove all the extra unnecessary languages as they take up about 2 gigs. Also, dont add extra Drivers (.KEXTS) which might cause conflicts. e.g. if You have NVIDIA geforce on your laptop, you should select NVDarwin from the “Graphics” section, not all.
Hit Ok when you are convinced!
6. Checking the disk and Installation of System files
Now your disk(DVD) will be checked for consistency, then, installation begins. It will take 20-45 minutes as per your hardware juice. After the installation is over, it will ask for a reboot. Remove the DVD after it has rebooted.
You should be able to automatically boot into OS X at this time.
7. Setting up the Boot Loader
Now that OS X is all working, we have to make the previous installation of Windows 7 or Vista to work. for this, I`ll use the Windows boot loader rather than chameleon boot loader built-in to OS X. This helps you prevent re-fixing MAC OS installation when you re-install windows at some time in future.
Put in your windows 7 or Vista disk, and boot from it. When installation starts, it prompts for “Recovery”. Select the recovery option. On you will be prompted to choose tools available for recovery. Select “command-line”.
DISKPART> list disk // displays the available HDD
DISKPART> select disk n // select the disk which has windows installation
DISKPART> list partition // list partitions on the selected disk
DISKPART> select partition n // select the partition number where windows was previously installed.
DISKPART> active //sets partition active
DISKPART> exit
REBOOT.
Now your vista /windows 7 should boot, If it doesn’t try this:
Boot with installation disk into windows setup, choose recovery again, and select automated recovery of boot area. Windows should fix the boot automatically, then click Fix and reboot button.
8. Adding MAC to the Boot menu via Windows:
Boot into windows normally and download EasyBCD from google. Open it, click “Add/Remove entries” navigate to “Mac”. Select Type in the dropdown to “Generic x86 Pc” and give some name in the text box below. This name will appear in your boot screen. Click “SAVE” when done and REBOOT.
9. There is no Step 9. You should be able to boot into booth MAC OSX Leopard and Windows without any issues.
Enjoy the wonderful world of MAC!

Send SMS For Free All Over the world

Here is one of the best services available on the web for sending SMS to your friends all over the world the best part is its free and unlimited..
You can send SMS for free to all the countries just you will need the country code and mobile number.
***Nepal Also*** 


Click here to send Free SMS

Recover Data From Corrupt Or Damaged CD, DVD, And Blu-Ray Discs

In order to recover data from hard drives, optical discs, and other storage mediums, many of us choose Recuva for the job. It’s a famous recovery tool from Piriform to seamlessly find and recover corrupted data from partially damaged hard drives & external storage mediums and from corrupted optical discs. However, if Recuva, for some inexplicable reasons, fails to recover data from corrupt or damaged optical disc, one has to consider other tools for recovering data from optical discs. If you are having a bad luck with Recuva, you can opt-in for CD/DVD/BlueRay Recovery.
It’s a simple tool which requires nothing except the source disc path and target location to recover data from damaged optical discs. It supports almost all forms of CD, DVD, and Blu-ray optical discs, including, DVD-R, DVD-RW, D-ROM, CD-R, and CD-RW. Unlike other recovery tools which try to recover whole disc data in one go, it allows user to specify folders to copy data from the disc.
As far as recovery success rate is concerned, the technique which is used to recover data from corrupted or damaged disc matters the most. According to developer, it works on simple principle of finding non-corrupted data blocks in inserted optical disc. First, it scans all the readable disk sectors, and then after identification, tries to rescue the damaged files. Once recovered, it starts copying all the corrected data to specified location.
The program is specifically built to recover data from multimedia, video, games, and audio discs. A detailed log file is generated to review which files have been recovered and copied successfully.
Usage is extremely simple. Just insert the disc having corrupted data, and from main interface, select Add Folder or Add Files to specify root path of disc/folders or specific files on disc, respectively. Once source files and folders are added, select the output folder followed by copying speed. There are 5 levels of copying speed, ranges from Slowest to Fastest. The Slowest mode provides best recovery results and conversely is the case with Fastest mode.
recovery 1
Once all settings are in place, simply click Copy to begin recovering data off the disc. The time it takes depends upon the number of corrupted files present on your CD/DVD/Blu-ray disc.
recovery 4
It works on Windows XP, Windows Vista, and Windows 7. You can use username “Martik” and Serial: “93016666K1M71T3WAM” to activate the free license.
Update: We have received information that Martik (the guy who released this app) is a theft. He steals software of others and post it as his own. This is a huge breach of trust in the software community. At AddictiveTips, we try to encourage developers to create software, not steal them. We are investigating more about this guy. For more information, check out the thread at PortableFreeware.

ESET Mobile Security For Android Fights Viruses, Spyware, Spam & Theft


ESET Mobile Security For Android

ESET couldn’t have picked a better time to make a debut in the Android Market. Currently under yet another malware onslaught, the Market needs more major players from the system security genre to step into the foray. ESET Mobile Security is a comprehensive security suite for Android that includes a virus/spyware on-demand and on-access scanner, SMS and MMS spam blocker, SIM authorization, remote control via SMS commands from an authorized phone number (or from Business Edition of ESET Smart Security and ESET NOD32 Antivirus), security audit, built-in task manager, automatic and manual security database updates and password protection for mentioned features. As of this writing, the app is in beta and available for free on the Android Market. However, there is no indication as to whether the final release will be free as well.

Security-RisksESET-Mobile-Security-for-Android
The interface is smooth, easy on the eyes and quite user-friendly. Each feature has a Help text that describes what each of the feature’s options do.
The Antivirus feature allows you to do a complete on-demand scan of your device, scan individual system and SD card folders, view scan logs, view, restore or delete quarantined files, enable or disable on-access scanning and more. The Antispam feature lets you block SMS/MMS or calls from a phone number of your choice. You can enter a new phone number, choose an existing contact and block messages and calls from all unknown numbers.
AntivirusAntispamAntispam-log-SMS-blocked
Anti-Theft options include adding Trusted SIM cards and phone numbers that will be alerted with an SMS upon installation of an unauthorized SIM. From Anti-Theft Settings, you can Enable SIM matching, allow remote control via SMS commands and alter the message body of the theft alert SMS. The Security Audit feature evaluates the status of applications and system settings. It also includes a comprehensive Task Manager that allows you to view and kill active Processes, Services and Tasks.
From within the Update screen, you can manually update the app’s virus database, set an interval for automatic updates or disable them entirely. The Password screen allows you to set a master password for the entire app. You can then select the features that you want it to protect. The password can even be set to protect the app from unauthorized uninstallation.
Anti-theft-settingsAdding-a-SIM
The application asks for administrator privileges at first launch. Oddly enough, it does not include the option to disable said privileges. Therefore, to uninstall the app, you’ll have to revoke its admin rights from device settings (Settings > Location and Security > Select device administrators > EMS).
You can grab the beta for free from the Android Market via the provided link or QR code.

Download ESET Mobile Security

Ripple Lock Is Honeycomb-Inspired Lockscreen Replacement For Android

Ripple Lock for Android is a lockscreen replacement app with an interface that takes after that of the Android 3.0 Honeycomb stock lockscreen. New to the Android Market, the app still requires quite a bit of refinement. The unlock animation, though quite stylish, tends to slow down at times and the status bar remains accessible while the lockscreen is active. Hopefully, said problems will be resolved in future updates.


Ripple-Lock-Honeycomb-LockscreenRipple-unlock-effect-2Ripple-unlock-effect
The unlock animation, courtesy of the Honeycomb-inspired ripple/pulse effect, looks quite snazzy. Drag the lock away from the center of the unlock circle and it begins generating ripples. Release your hold on it and after a few ripples it returns to its original position. Drag it to the edge of the circle to unlock.
Ripple Lock allows you to enable or disable its lockscreen when required. Simply launch the app from the app drawer and select START/STOP to do so.
The ads that appear on the lockscreen in the free version of the app effectively destroy its purpose, which is to replace your native lockscreen with one that has more oomph. The only way to remove said ads is to download a few of the apps advertised in them.  Each download earns you a bunch of points. Get to a hundred and you can remove the ads from the app’s settings menu. Alternatively, you can purchase the ad-free paid version of the app.
Free
Free
Paid
Paid
Download Ripple Lock Free (Free)
Download Ripple Lock (Paid)

Saturday, June 4, 2011

Enable Automatic Call Recording On Samsung Galaxy S I9000

Now you can record calls automatically on your Samsung Galaxy S I9000 thanks to XDA-Developers forum member antsm who has come up with a mod for the phone app that allows you to automate call recordings. In addition, Dark3n has also developed an app that allows you to control the features of this mod very easily! If you have a choppy memory or you like to keep records of all your conversations on this Samsung Galaxy S Series device, this mod is a must for you.

The mod, so far called Phone.apk, has the following features to offer right now:
  • Calls are automatically recorded, both outgoing or incoming.
  • Call recording continues even after actions such as hold, conference mode etc.
  • Recording continues even when the dialer is minimized to background.
Now when this mod is coupled with Dark3n’s Automatic Call Recording Control, the user can easily toggle the given options in the mod through a simple GUI. The app allows you to do the following:
  • Toggle automatic recording on or off for incoming and outgoing calls.
  • Change file naming pattern for the recorded calls.
  • View .rec_template file.
The image below courtesy of Dark3n shows you just how simple the app actually is.

image
Now let’s install the mod and then the app using fairly simple procedures.
Requirements:
Instructions:
  1. Power your phone off and boot it into ClockworkMod Recovery.
  2. Wipe cache and Dalvik cache. Do NOT wipe data/factory reset, or you’ll end up loosing all your apps and user data.
  3. Select ‘Install zip from sdcard’
  4. Select the zip file for the mod and wait for the installation to finish.
  5. Reboot, and then from any file manager (such as our favorite Astro File Manager), install the Call Recording Control.apk file.
Uninstallation:
During the installation process, the script automatically backs up your original Phone.apk and related files to /sdcard/tmp/phone_bkp/update_restore-orig-phone.zip. To roll back, simply flash this zip file from recovery.

Voila! All done and good to go, you now have automatic call recording setup on your Samsung Galaxy S. Now your friends and co-workers better be really careful with what they say the next time they call you. Please provide us with your feedback on this app, and for any suggestions or queries, visit the thread at XDA-Developers.

Enable 1080p HD Video Recording And Enhance Sound Capture On Galaxy S II


SGS2 SGS2

Samsung Galaxy S II is quickly becoming one of the most favored Android handsets among users. The main reason for this likeability of this particular handset is it’s powerful processor complimented by easy customizations, hacks and modifications. Lately, XDA member Potatoman,  has released a modified version of Camera.apk for this phone that will enable you to increase video bitrate in 1080p HD and 720p. And another awesome fact is that now you will be able to use your phone’s camera or camcorder at lowest battery level and record audio at a whooping 1920 KBPS instead of crappy 64 KBPS.

Here are the features of this mod straight from the developer himself:
The apk replaces the stock Camera.Apk in the Galaxy S II, and has the following features-
- Allows use of the camera & camcorder at any battery life
- Records Audio in 192kbps/44.1Khz quality (CD Quality) rather than stock (64kbps/16khz quality)
- Increased Video Bitrate in 1080 and 720p modes* (See 2nd post for info and download link for this version)
- Optional No Sounds versions (for Standard and Highbit versions!). All of the features, None of the noise! Yes, even the autofocus noise is gone!
- HyperX-’s SuperHighBit version now available (See 2nd post for info and download link for this version)
I have left the settings for the 320×240 and 176×144 resolution modes as stock, so they will be the same size and with the same audio. This is to ensure video messages are kept within the file size limits
So let’s cut the rant short and see how you can enable 1080p recording along with enhancing audio capture using modified camera.apk.
Please note that this hack / mod is only applicable and tested on Samsung Galaxy S II
  1. The first step is to make sure that you have root on your Samsung Galaxy S II. You can follow the guide posted here to acquire root on your device.
  2. Now download Root Explorer from Android Market.
  3. Once the root explorer is downloaded and installed on your phone, download the hacked camera.apk file from here, unzip the modified apk and copy to /system/app of your phone. You will first need to copy the file on your SD Card and then move it to the said location using Root Explorer or any other file manager.
  4. After you have copied the file to /system/app, then rename the already existing camera.apk as camera.apk.bak. This will disable the current camera app and keep it as a backup. In case the new app creates problem, you can rename the old app to camera.apk for restoration purposes.
  5. Now rename the modified apk file you earlier copied to /system/app to Camera.apk.
  6. Once done, exit the Root Explorer and tap on camera icon.
  7. Install the app following onscreen instructions and you are all set to capture video at 1080p HD.
In case you are stuck or need more information regarding this app, then head to the official XDA thread link provided in Step 3.
Disclaimer: Please follow this guide at your own risk. I will not be liable if your device gets damaged or bricked during the process.

Dolphin Browser HD v5.0 Finally Released To The Android Market

One of the best mobile browsers on the market just got better. Receiving improvements in speed and UI through one private and three public betas, Dolphin Browser HD v5.0 has finally hit the Android Market. The browser is now ad-free, features a new and improved UI design, a Chrome-like Speed Dial page, improved performance and four new downloadable themes.


Speed-DialCustom-folders-in-bookmarksBookmarks-bar
You can now reopen previously closed tabs (Undo), navigate to your favorite and/or Most Visited websites sites with a single tab via the new Speed Dial page that appears upon opening a new tab. Improvements in the user interface include a redesigned Bookmarks bar with Quick Access to browser settings and essential features and four new themes downloadable from within the browser (Swipe right to Bookmarks bar, then select Quick Access > Themes) or directly from the Android Market.
Another handy new feature is the option to add subfolders of your own to the bookmarks list. To create a new bookmarks subfolder, navigate to the bookmarks list from Quick Access, hit Menu and tap New Folder. For those shifting over from the stock browser or the original Dolphin Browser, it includes the option to import bookmarks from the two. At first launch, the browser automatically asks you whether you would like to import bookmarks. Alternatively, you can do so later from Menu > Settings > Backup & Restore > Import Bookmarks.
Install (or upgrade to) the new version for free from the Android Market via the provided link or QR code.


Download Dolphin Browser HD